No items found.
Deploy a self-service business intelligence project with Whaly & Airbyte
Learn how to move your data to a data warehouse with Airbyte, model it, and build a self-service layer with Whaly’s BI platform.


Learn how to move your data to a data warehouse with Airbyte, model it, and build a self-service layer with Whaly’s BI platform.
Download our free guide and discover the best approach for your needs, whether it's building your ELT solution in-house or opting for Airbyte Open Source or Airbyte Cloud.


Self-service BI is fundamental to a company’s ability to make critical business decisions when it counts. For these decisions to be made in a timely manner, all stakeholders need to have an ongoing pulse on what’s going on in the business.
The challenge with the process of turning raw data into insights is that the end data consumers are Sales reps, CMOs, Heads of Growth, and others - who tend not to come from technical backgrounds, and aren’t responsible for the technical majority of the data process: collection, integration with Airbyte, transformation, and modeling.
As a result, business teams are dependent on data teams for their dashboards and reports. This model isn’t scalable because the data teams end up being a bottleneck, and business teams aren’t autonomous, which could slow business growth.
BI platforms with a self-service layer, like Whaly, empower business teams to serve themselves the analytics they need, when they need it, in a drag & drop interface that’s intuitive to non-technical users.
This is a game-changer because:
Airbyte benefits:
Whaly benefits:
How they’re better together:
Getting started with Whaly and Airbyte is simple! Use Airbyte to get all your data into your data warehouse, and perform analytics on it with Whaly’s BI platform. Follow our step-by-step guide below:
Step 1: Set up your data sources
Create a Airbyte Cloud account to get started. Through its user interface (UI), Airbyte can connect to a wide variety of data sources, from business applications to databases. From the Sources tab, select your data source from the drop-down menu.
In our example, we’ll use the Slack data source.

Once you have selected your data source, Airbyte will run you through a set-up guide to connect to your data source.

Step 2: Set up a Warehouse destination
Once you have your source, the next step is to set a destination to which Airbyte can connect and write your data. Airbyte supports a large number of destinations, including cloud data warehouses like Google BigQuery and Snowflake.

Whaly supports both Snowflake and BigQuery. We’ll use BigQuery in this example, as it has a nice free tier.
Step 3: Set up connections between your sources and BigQuery destination
Fill out the proper information as per Airbyte documentation, in order to connect to the BigQuery instance.

How to set up Airbyte to feed Slack data into BigQuery
Once the BigQuery credentials are validated, we’re redirected to the Slack configuration panel where we can select which tables we want to sync.

Once the connection is set up, the sync begins. Grab yourself a cup of coffee while it runs ☕

Step 4: Connect Whaly to your BigQuery instance
When creating your Whaly account, you’ll be asked for your BigQuery credentials. The full instructions for getting those credentials is explained in our documentation: https://docs.whaly.io/warehouse/bigquery/connect-your-bigquery


Step 5: Import the data to be queried
Now, we’ll go through the “Workbench” interface to import the data tables that Airbyte has created.
Workbench is a tool within Whaly’s platform that only data practitioners can access to create models and produce “Explorations” that will be published in the Workspace. The Workspace is the tool in which data consumers (business teams) can build and access their dashboards.
This line of separation is important for ensuring strong governance in the business intelligence platform.
Once you’re in the Workbench, click on “+” button next to the Source to import our Airbyte datasets.

Step 6: Create a self-service layer
By clicking on “Import Dataset”, we’re able to list all the tables that Airbyte has created and import the relevant ones into Whaly.

We can now see a preview of the tables and their schema to understand how the data is shaped and structured.

Now that we have a solid overview of our data, we’ll create a “self-service layer” on top of it. This can be considered a lightweight semantic layer, which serves as the interface and link between the data producers and practitioners, and the data consumers.
In the first step, we’ll declare the relationship between the tables:
For each relationship, we select the matching columns that will be used to combine the tables together.

In the end, we have declared all the relationships ⤵️

We can now create an “Exploration” on top of these tables to declare the dimensions and the metrics that will be made available to our data consumers.
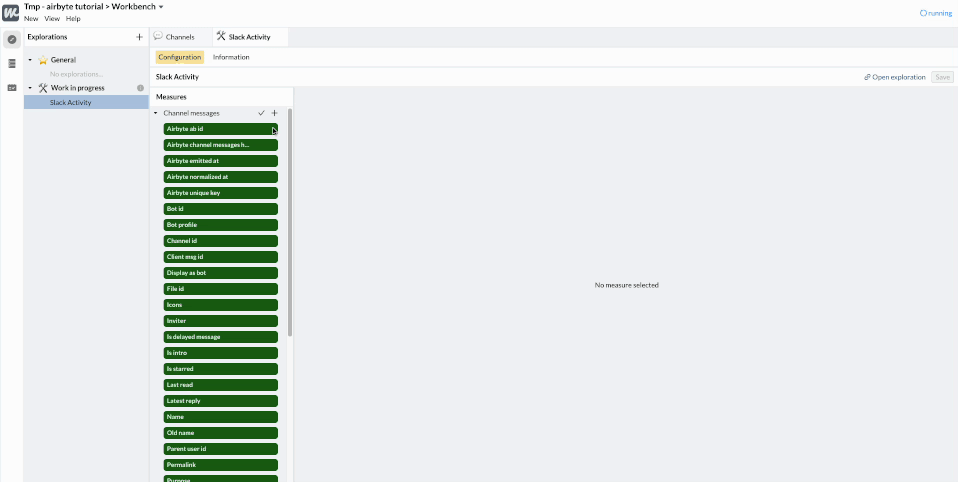
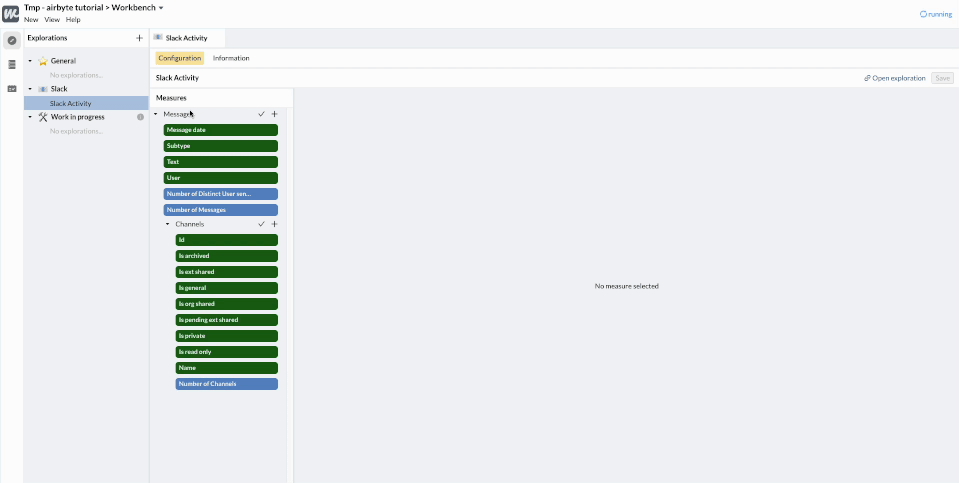
As you can see, a lot of dimensions (in 🟩) and metrics (in 🟦 ) have been automatically created by analyzing the table schema. We can quickly clean them up, keeping only the most interesting ones, and discarding those that don’t add value.
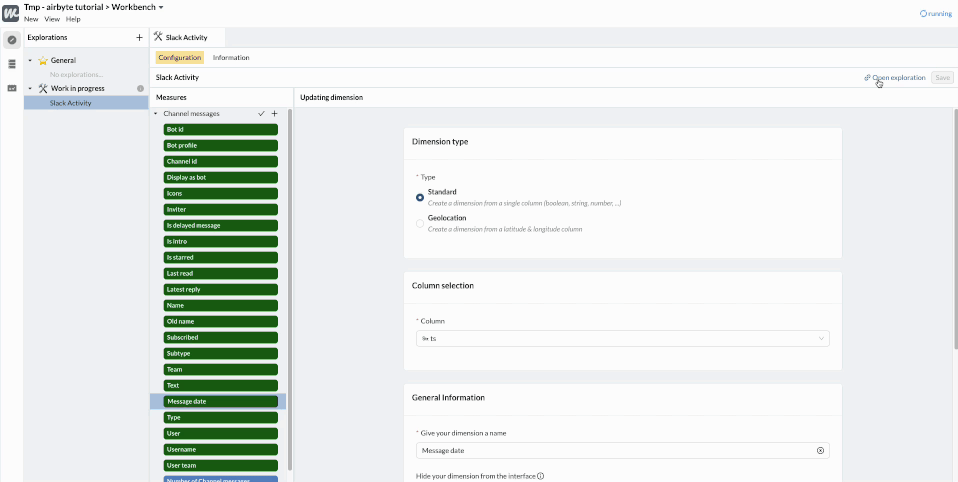
We can also rename and add descriptions to the important dimensions. For example our table provided by Airbyte has a ts column. This is the abbreviation for “timestamp” which is an engineering term. Our business users will prefer to call this column “Message date”.

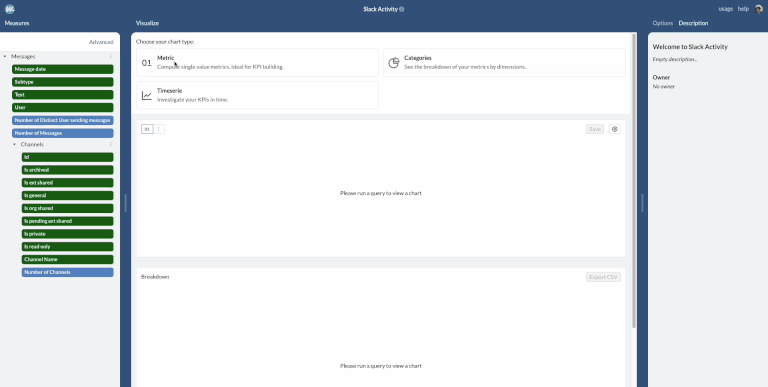
At any time, we can click “Open exploration” to preview what the Query Builder will look like for data consumers and dashboards builders.
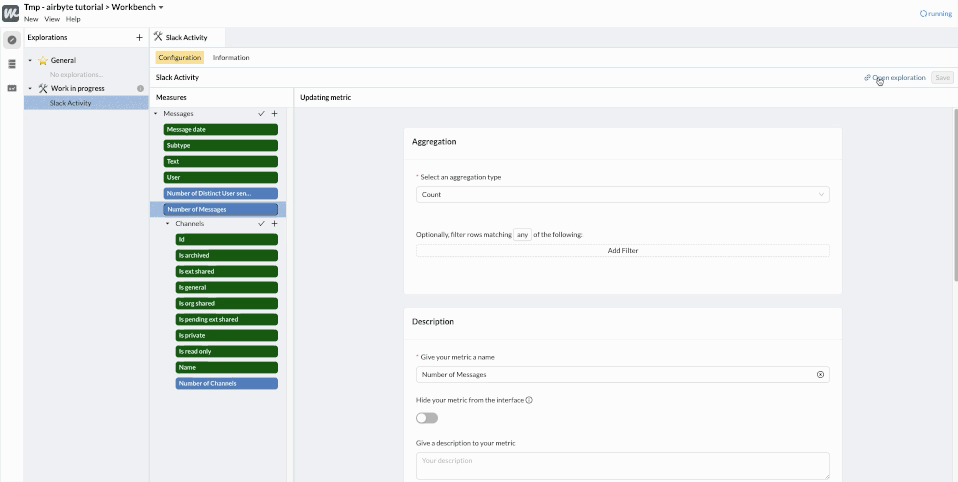
Now that we have some interesting dimensions and metrics on the “Message” table, let’s add the “Channel” table, to understand where the messages are being sent within Slack. To do that, we can add a related table in our Exploration.
Note: A dynamic JOIN will be executed when needed, as a result of the relationships that we have previously declared. As Whaly knows everything about the schema, the nature of the relationships and of the matching columns, this JOIN will be optimized to avoid the “fan-out” problem that can break some reports.

Now that we have added the “Channel” table, we can use it to break down the number of messages per Channel in the query builder interface.
We can see that most messages are sent in 2 Slack channels: poseidon/prod, which contain automatic notifications. We will remove them when building dashboards.
To finalize our Exploration, we’ll configure the Drills to let people interact with the charts that they will create or access.
Now, whenever an end user charts something from this Exploration, he or she will be able to click on the chart to dig deeper and understand the details behind the figures - like content of the messages, the channel it was sent to, etc.

Based on the messages, we can see that the last week of December was a celebration week for the team 👍🍾
Step 7: Create a dashboard
Now that we have an Exploration ready, with information from the Message table and the Channel table, we can create our first dashboard.
This time, we’ll do everything within the “Workspace” environment as data consumers (C-Level / Managers / Business users). The exploration has been created to enable self-service reporting across your organization, so now, non-technical business users can access analytics autonomously.
In the Workspace, the data consumer can access the Explorations that we built in the Workbench in the “Explore” part of the left menu.

Let’s start by asking ourselves a question that we want to answer, “what is the breakdown of messages per day and per channel?”
Here, we can run a query based on the relevant metrics and dimensions on the left hand side. Once we’re happy with the outcome of the chart, we can save it to a Dashboard. This will redirect us to the dashboard studio.

In the dashboard studio, we can add other charts, re-position them, add filters and customize everything. Now, let’s add a time filter and a title.

This way, when data consumers access the dashboard directly from the Workbench, they will be able to change the filter value to match their needs.

We can also store the Dashboard inside a “Slack” folder on the menu on the left hand side, so that people can find it more easily when browsing the Workbench.

Now you have the beginning of your Slack dashboard, with the data connected into Whaly through Airbyte.
Whaly is a full-blown BI platform, so this is only the beginning. To better analyze our Slack data, you can share this dashboard via a password-protected link, manage the dashboard’s access control, blend other data sources, create new models (SQL or no-code) - but that’s the gist of it, and enough for today!
Getting started with Airbyte & Whaly is simple. Airbyte Cloud offers a free trial so you can start syncing your data into your data warehouse. You can also sign up for a free trial of Whaly here. Once your data is in your warehouse, you can load the data easily into Whaly's self-service BI platform, to start visualizing and learning from your data. If you have any questions or feedback, please reach out to anna@whaly.io.
Download our free guide and discover the best approach for your needs, whether it's building your ELT solution in-house or opting for Airbyte Open Source or Airbyte Cloud.


Learn how to build a connector development support bot for Slack that knows all your APIs, open feature requests and previous Slack conversations by heart


Use Octavia CLI to import, edit, and apply Airbyte application configurations to replicate data from Postgres to BigQuery.
Learn how to ingest and transform Github and Slack data with SQL and Python-based transformations.