API to Warehouse Basic Stack with Airbyte
Seamlessly extract data from diverse APIs using Airbyte and store it in popular data warehouses. This post spotlights the integration of Github API with Snowflake.
Welcome to the "API to Warehouse Stack" repository! This repository offers a simple template to help you get data from various APIs and put it into your data warehouse for further analysis using Airbyte. You can use several supported APIs as your data sources for this process. Here are a few examples of the APIs you can set up to extract data using Airbyte:
Here are some data warehouses that users can choose as a destination to load the data extracted from APIs:
- Snowflake
- BigQuery
- Amazon Redshift
- Many more
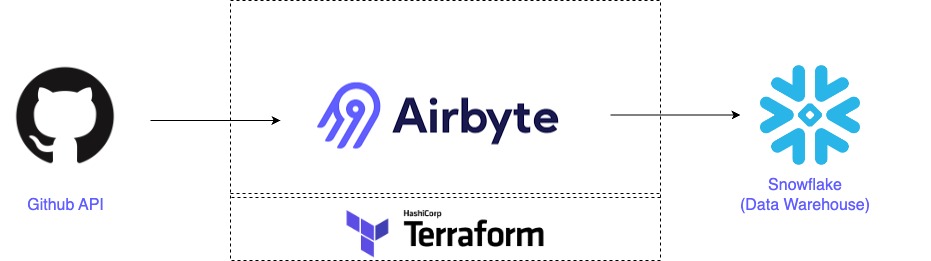
In this process, we'll use the Github API to get data and Snowflake as the data warehouse to store the data.
Infrastructure Layout
Prerequisites
Before you embark on this integration, ensure you have the following set up and ready:
- Python 3.10 or later: If not installed, download and install it from Python's official website.
- Docker and Docker Compose (Docker Desktop): Install Docker following the official documentation for your specific OS.
- Airbyte OSS version: Deploy the open-source version of Airbyte. Follow the installation instructions from the Airbyte Documentation.
- Terraform: Terraform will help you provision and manage the Airbyte resources. If you haven't installed it, follow the official Terraform installation guide.
Setting an environment for your project
Get the project up and running on your local machine by following these steps:
1. Clone the repository (Clone only this quickstart):
2. Navigate to the directory:
3. Set Up a Virtual Environment:
For Linux and Mac:
For Windows:
4. Install Dependencies:
1. Using Airbyte UI (If you prefer to use Terraform, skip this step)
To establish the connection and import data from the Github API into the Snowflake warehouse, kindly proceed by utilizing the Airbyte user interface. The following steps should be adhered to:
- Run the Airbyte OSS version by following the documentation.
- Setup the Github API as source by following these steps.
- Setup the Snowflake as destination by following these steps.
- Please proceed to configure the synchronization time and select the specific tables you wish to load into Snowflake from GitHub. You can make your selection from the list of available streams.
- Enjoy 😄, your data loaded into Snowflake data warehouse from Github API.
2. Using Terraform to Setup the Connector
Airbyte enables you to make connections between different platforms by creating connectors for sources and destinations. In this project, we're using Terraform to automate the setup of these connectors and their connections. Here's how you can do it:
1. Navigate to the Airbyte Configuration Directory:
Change to the relevant directory containing the Terraform configuration for Airbyte:
2. Modify Configuration Files:
Within the infra/airbyte directory, you'll find three crucial Terraform files:
- provider.tf: Defines the Airbyte provider.
- main.tf: Contains the main configuration for creating Airbyte resources.
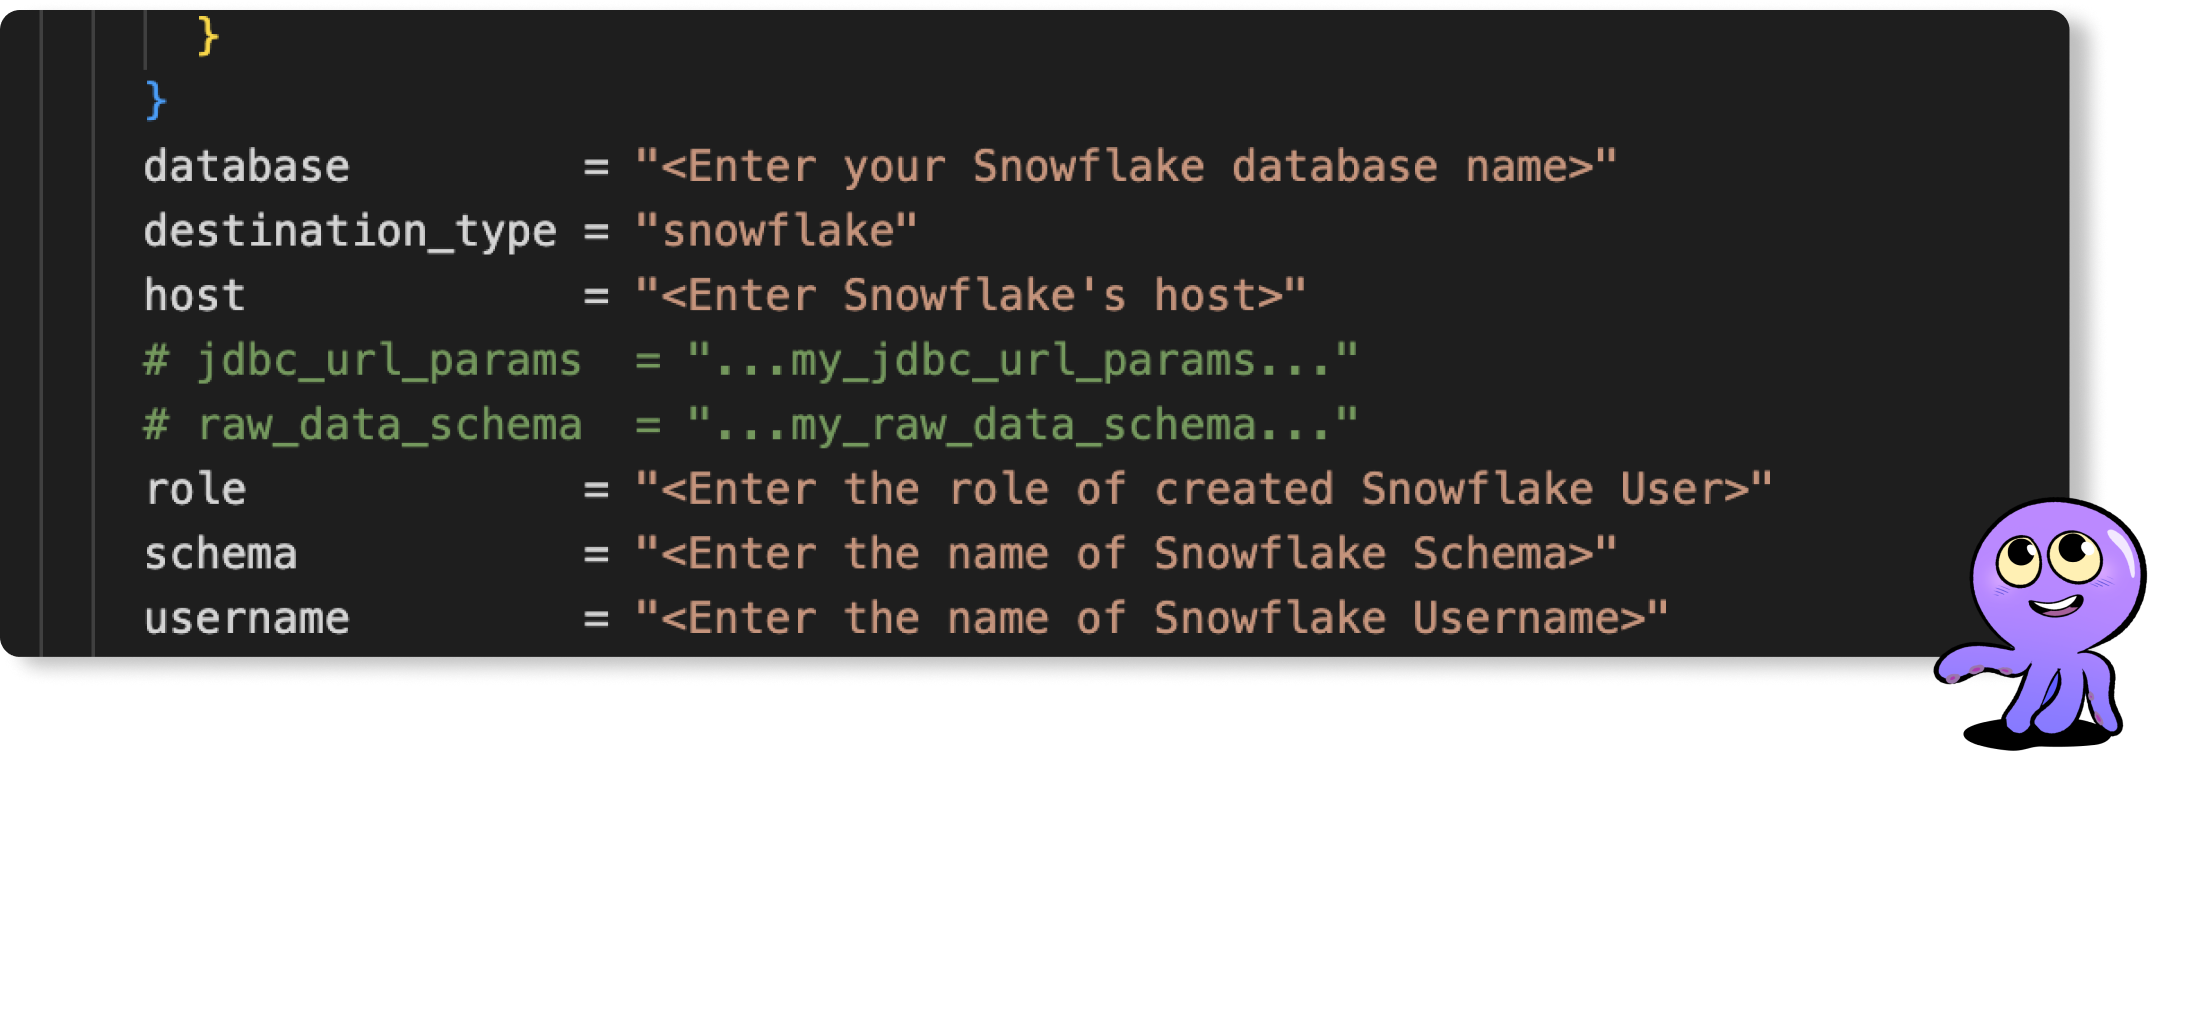
- variables.tf: Holds various variables, including credentials.
Adjust the configurations in these files to suit your project's needs. Specifically, provide credentials for your Postgres connections. You can utilize the variables.tf file to manage these credentials.
3. Initialize Terraform:
This step prepares Terraform to create the resources defined in your configuration files:
4. Review the Plan:
Before applying any changes, review the plan to understand what Terraform will do:
5. Apply Configuration:
After reviewing and confirming the plan, apply the Terraform configurations to create the necessary Airbyte resources:
6. Verify in Airbyte UI:
After Terraform finishes its tasks, go to the Airbyte user interface. You will find your source and destination connectors already set up, along with the connection between them, all ready to use.
Next Steps
After you extract and load data from an API into a data warehouse, you can analyze the data. For example, we used Snowflake data warehouse, which supports analytical tools like Tableau, Talend and Sigma.
Getting started is easy
Start breaking your data siloes with Airbyte


