Shopping Cart Analytics Stack With Shopify, Airbyte, dbt, Dagster and BigQuery
Optimize your e-commerce strategy with the Shopping Cart Analytics quickstart. This example stack uses Shopify, Airbyte, dbt, BigQuery, and Dagster. Extract, analyze, and leverage Shopify data to gain actionable insights with ease.
Welcome to the "Shopping Cart Analytics Stack" repository! ✨ This is your go-to place to easily set up a data stack using Shopify, Airbyte, Dbt, BigQuery, and Dagster. With this setup, you can pull Shopify data, extract it using Airbyte, put it into BigQuery, and play around with it using dbt and Dagster.
This Quickstart is all about making things easy, getting you started quickly and showing you how smoothly all these tools can work together!
Below is a visual representation of how data flows through our integrated tools in this Quickstart. This comes from Dagster's global asset lineage view:
.svg)
Prerequisites
Before you embark on this integration, ensure you have the following set up and ready:
- Python 3.10 or later: If not installed, download and install it from Python's official website.
- Docker and Docker Compose (Docker Desktop): Install Docker following the official documentation for your specific OS.
- Airbyte OSS version: Deploy the open-source version of Airbyte. Follow the installation instructions from the Airbyte Documentation.
- Terraform: Terraform will help you provision and manage the Airbyte resources. If you haven't installed it, follow the official Terraform installation guide.
- Google Cloud account with BigQuery: You will also need to add the necessary permissions to allow Airbyte and dbt to access the data in BigQuery. A step-by-step guide is provided below.
Setting an environment for your project
Get the project up and running on your local machine by following these steps:
1. Clone the repository (Clone only this quickstart):
2. Navigate to the directory:
3. Set Up a Virtual Environment:
For Linux & Mac:
For Windows:
4. Install Dependencies:
Setting Up BigQuery
1. Create a Google Cloud Project
- If you have a Google Cloud project, you can skip this step.
- Go to the Google Cloud Console.
- Click on the "Select a project" dropdown at the top right and select "New Project".
- Give your project a name and follow the steps to create it.
2. Create BigQuery Datasets
- In the Google Cloud Console, go to BigQuery.
- Make two new datasets: raw_data for Airbyte and transformed_data for dbt.
- If you pick different names, remember to change the names in the code too.
How to create a dataset:
- In the left sidebar, click on your project name.
- Click “Create Dataset”.
- Enter the dataset ID (either raw_data or transformed_data).
- Click "Create Dataset".
3. Create Service Accounts and Assign Roles
- Go to “IAM & Admin” > “Service accounts” in the Google Cloud Console.
- Click “Create Service Account”.
- Name your service account (like airbyte-service-account).
- Assign the “BigQuery Data Editor” and “BigQuery Job User” roles to the service account.
- Follow the same steps to make another service account for dbt (like dbt-service-account) and assign the roles.
How to create a service account and assign roles:
- While creating the service account, under the “Grant this service account access to project” section, click the “Role” dropdown.
- Choose the “BigQuery Data Editor” and “BigQuery Job User” roles.
- Finish the creation process.
4. Generate JSON Keys for Service Accounts
- For both service accounts, make a JSON key to let the service accounts sign in.
How to generate JSON key:
- Find the service account in the “Service accounts” list.
- Click on the service account name.
- In the “Keys” section, click “Add Key” and pick JSON.
- The key will download automatically. Keep it safe and don’t share it.
- Do this for the other service account too.
Setting Up Airbyte Connectors with Terraform
Airbyte allows you to create connectors for sources and destinations, facilitating data synchronization between various platforms. In this project, we're harnessing the power of Terraform to automate the creation of these connectors and the connections between them. Here's how you can set this up:
1. Navigate to the Airbyte Configuration Directory:
Change to the relevant directory containing the Terraform configuration for Airbyte
2. Modify Configuration Files:
Within the infra/airbyte directory, you'll find three crucial Terraform files
- provider.tf: Defines the Airbyte provider.
- main.tf: Contains the main configuration for creating Airbyte resources.
- variables.tf: Holds various variables, including credentials.
Adjust the configurations in these files to suit your project's needs. Specifically, provide credentials for your BigQuery connection. You can utilize the variables.tf file to manage these credentials.
3. Initialize Terraform:
This step prepares Terraform to create the resources defined in your configuration files.
4. Review the Plan:
Before applying any changes, review the plan to understand what Terraform will do.
5. Apply Configuration:
After reviewing and confirming the plan, apply the Terraform configurations to create the necessary Airbyte resources.
6. Verify in Airbyte UI:
Once Terraform completes its tasks, navigate to the Airbyte UI. Here, you should see your source and destination connectors, as well as the connection between them, set up and ready to go.
Setting Up the dbt Project
dbt (data build tool) allows you to transform your data by writing, documenting, and executing SQL workflows. Setting up the dbt project requires specifying connection details for your data platform, in this case, BigQuery. Here’s a step-by-step guide to help you set this up:
1. Navigate to the dbt Project Directory:
Change to the directory containing the dbt configuration:
2. Update Connection Details:
You'll find a profiles.yml file within the directory. This file contains configurations for dbt to connect with your data platform. Update this file with your BigQuery connection details.
3. Utilize Environment Variables (Optional but Recommended):
To keep your credentials secure, you can leverage environment variables. An example is provided within the profiles.yml file.
4. Test the Connection:
Once you’ve updated the connection details, you can test the connection to your BigQuery instance using:
If everything is set up correctly, this command should report a successful connection to BigQuery.
5. Run the Models:
If you would like to run the dbt models manually at this point, you can do so by executing:
You can verify the data has been transformed by going to BigQuery and checking the transformed_data dataset.
Orchestrating with Dagster
Dagster is a modern data orchestrator designed to help you build, test, and monitor your data workflows. In this section, we'll walk you through setting up Dagster to oversee both the Airbyte and dbt workflows:
1. Navigate to the Orchestration Directory:
Switch to the directory containing the Dagster orchestration configurations:
2. Set Environment Variables:
Dagster requires certain environment variables to be set to interact with other tools like dbt and Airbyte. Set the following variables:
Note: The AIRBYTE_PASSWORD is set to password as a default for local Airbyte instances. If you've changed this during your Airbyte setup, ensure you use the appropriate password here.
3. Launch the Dagster UI:
With the environment variables in place, kick-start the Dagster UI:
4. Access Dagster in Your Browser:
Open your browser and navigate to http://127.0.0.1:3000. Here, you should see assets for both Airbyte and dbt. To get an overview of how these assets interrelate, click on "view global asset lineage". This will give you a clear picture of the data lineage, visualizing how data flows between the tools.
5. Materialize Dagster Assets:
In the Dagster UI, click on "Materialize all". This should trigger the full pipeline. First the Airbyte sync to extract data from Shopify and load it into BigQuery, and then dbt to transform the raw data, materializing the staging and marts models.
Next Steps
Congratulations on deploying and running the Shopping Cart Analytics Quistart! 🎉 Here are some suggestions on what you can explore next to dive deeper and get more out of your project:
1. Explore the Data and Insights
- Dive into the datasets in BigQuery, run some queries, and explore the data you've collected and transformed. This is your chance to uncover insights and understand the data better!
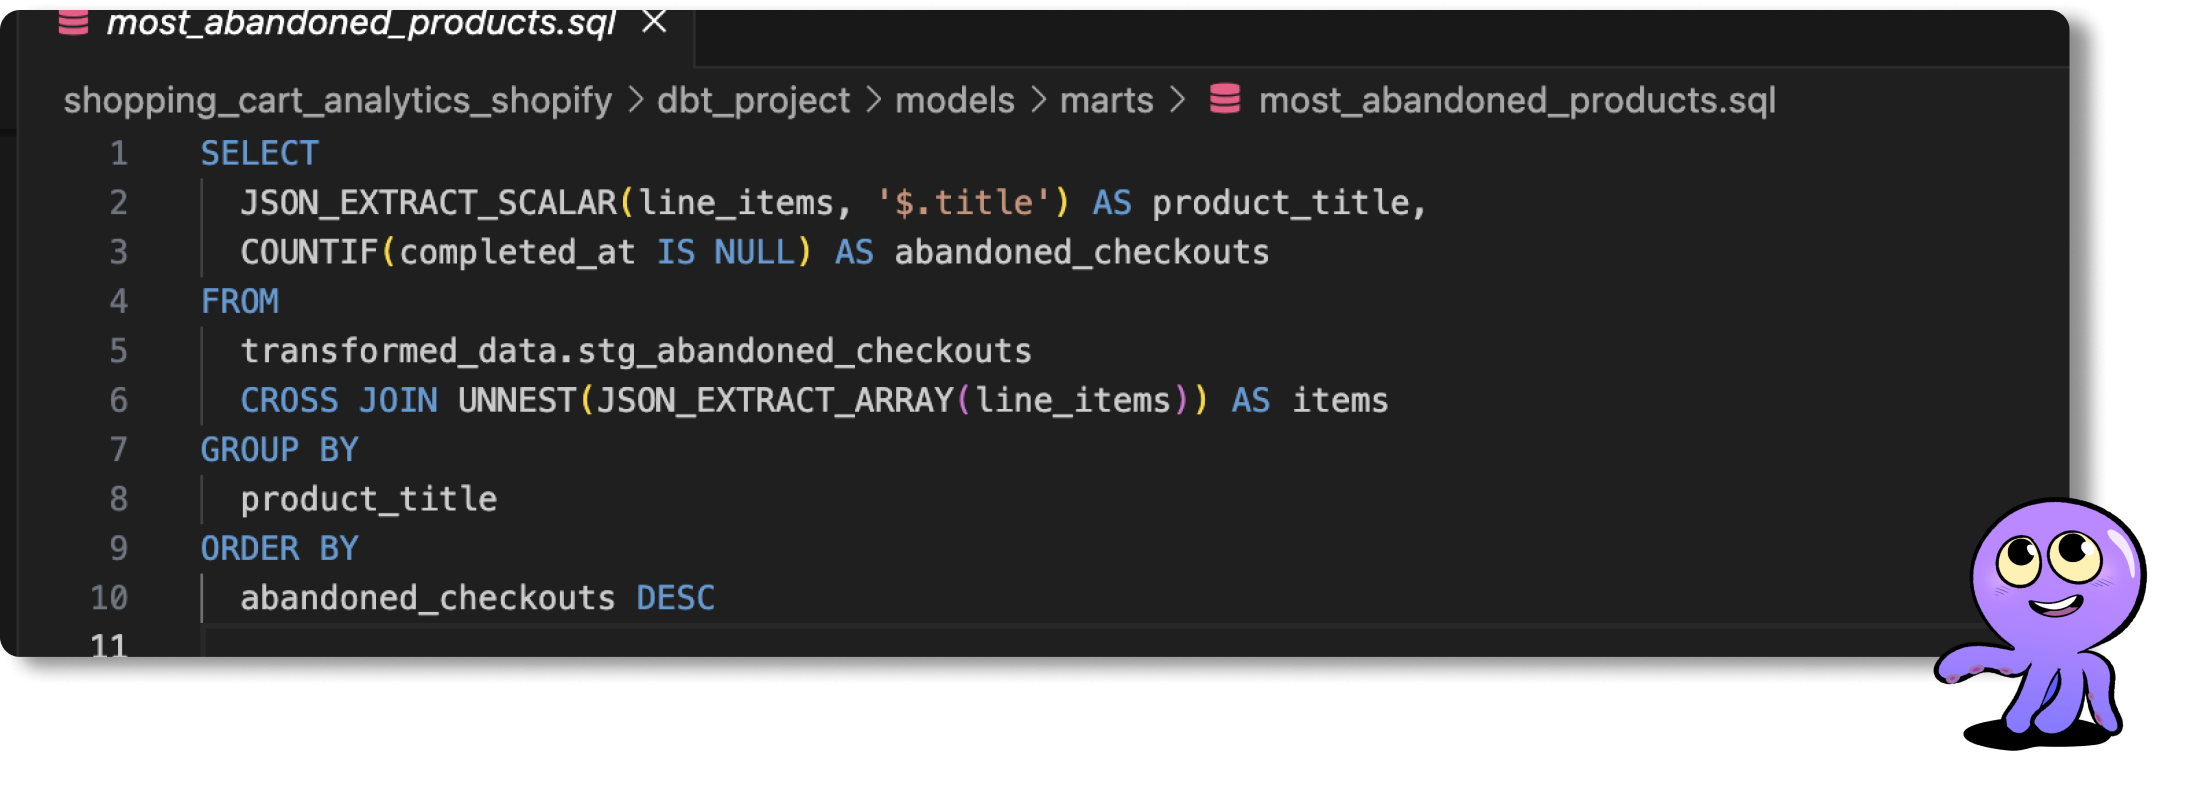
2. Optimize Your dbt Models
- Review the transformations you’ve applied using dbt. Try optimizing the models or create new ones based on your evolving needs and insights you want to extract.
3. Automate and Monitor Your Pipelines
- Explore more advanced Dagster configurations and setups to automate your pipelines further and set up monitoring and alerting to be informed of any issues immediately.
Getting started is easy
Start breaking your data siloes with Airbyte


